TL;DR
I use Azure Static Web Apps together with the Hugo static site generator as my blogging solution. It is backed by GitHub to make use of the preview environments of Azure Static Web Apps. I use the paid plan to enable adding a password to any environment that is not deployed from the main branch. If you just want to know how, skip ahead.
So, I got myself this blog
I have been wanting to start blogging for a while now. Due to various reasons I may address in future posts, it took me a bit to actually get there. For now, I will take you along on the journey to get my blog running.
Special thanks to Mart de Graaf for challenging me to finally get something out there.
I had a few considerations when I started out to get myself a blog.
- I dislike fiddling with widgets and trying to get the layout just the way I want it in a CMS.
- I also do not want to manage or maintain a database server.
- I don’t have the time or desire to build my whole website from scratch. Some theming or scaffolding would be nice.
- I normally write all my documentation in Markdown. It’s easy, it renders nicely enough and it gets the job done. It would be great if I could also use it for my blog.
- Setting up the hosting should be simple and preferably cheap.
- I would like to be able to work on future posts at my own pace and preview them privately.
When all is said and done I only want to worry about writing new posts, and choosing when they show up online.
After a bit of research and some discussion with my colleagues I settled on this combination:
- The Hugo static site generator is a GO-based framework to transform Markdown files into static web pages, and there are a ton of themes online so I can get started quickly.
- Azure Static Web Apps is as the name implies meant for hosting static websites. It is free on the base tier, and not all that expensive on the paid one.
- All of this setup requires that I make use of a Git repository, and Azure Static Web Apps has a special advantage when combined with GitHub: it can create preview environments when you use GitHub Actions to deploy the website. This takes care of my last wish.
Starting quick
First things first - I wanted to make sure that I had a running website, deployed from source control with a proper pipeline. Adding content with Hugo comes later, and I will cover that in another post.
To get a basic setup, all I had to do was follow the Quickstart for Azure Static Web apps from Microsoft. It really is a quickstart - get your own repo initialized by starting from a simple “vanilla” template repo from Github, then use the Azure Static Web Apps extension for Visual Studio Code to publish that base website as an Azure Static Web App. It will also add a Github Actions workflow to your repo that runs on pull request or push to your main branch.
Please make sure to select the right subscription when using the VS Code extension. I forgot to double-check and didn’t see my resources at first.
An unexpected bonus was that the “vanilla” repo includes Github Actions workflows for Playwright - a relatively new framework for scripted browser testing. I was planning on checking Playwright out - it’s nice to already have the setup in place.
Branching out
The combination of GitHub and Azure Static Web Apps provides the last thing to fix before getting into actually creating content - preview environments. When you create a change on a branch and then a pull request in Github, the GitHub Actions workflow that was generated during the Quickstart will create a preview environment in Azure and provide you with a link in the pull request conversation log when it is ready and available. This method can support up to 3 environments on the free tier, and the environment automatically gets cleaned up once the pull request is closed too.
To demonstrate:
In Github I created a branch named Demo, and committed some changed text in /src/index.html.
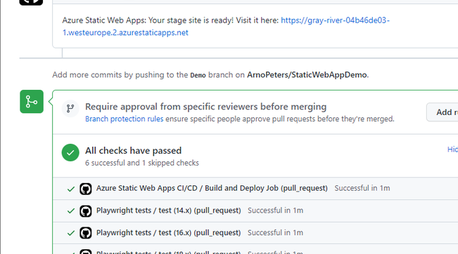
I then created a pull request, which automatically trigged the workflow that was created during the quickstart to run. The playwright tests also run at the same time.
A preview environment was generated, and the URL that can be used to access the environment was posted in the Conversation log of the pull request.
Securing the preview environment
There is only one small issue with the default preview environments - they are NOT secured. Granted, the URL is pretty random, but before I release anything online I still would like some kind of password protection to be able to preview a blog post at my own pace without anybody finding out how many typos I make.
This is where Azure Static Web Apps comes in. It already supports using either a Twitter, GitHub or Azure Active Directory account as a login, but that only works if you manually write a routing file to specify which parts of the site you want to secure with a password. If for example, you want to secure only some subroutes on the production environment instead of the whole site in the preview, you have to adjust your pipeline to deploy a different routing config. And that will then also impact any automated tests that might run against the website.
I switched to the paid plan for Static Web Apps in Azure because it has the option to put Basic Authentication around your entire site. You can pick whether or not you only want that on preview branches, or your production branch as well. It also stacks with the other logins - after the basic auth challenge the other 3 login types work on the same routes as in production.
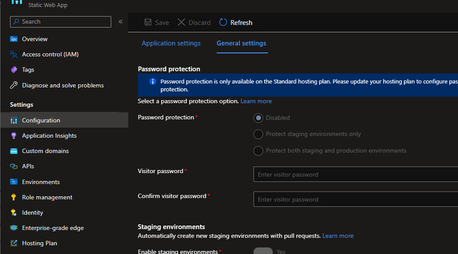
To start, check what plan you are on. Go to your Static Web App in Azure -> Configuration -> General Settings. If you are on the free plan, the general settings are all defaults and greyed out: password protection and staging environments are not configurable.
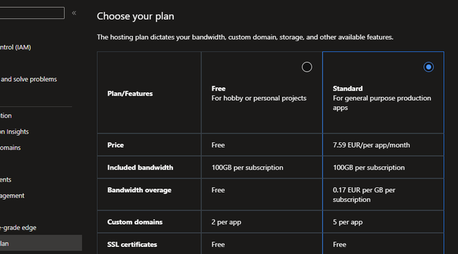
To enable these settings, go to Hosting Plan and switch to the ‘Standard’ plan
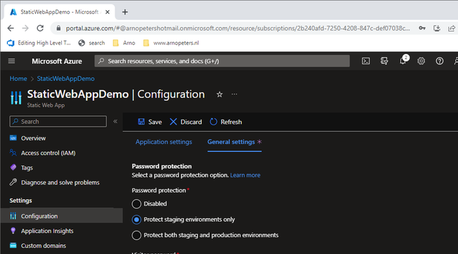
Then go to Configuration -> General Settings
- Enable password protection for the environments you want to secure. Since I am hosting a blog, I only want my preview environments secured.
- Set a password. It is one password for all environments, so pick a good one.
Ensure the bottom toggles are active:
- Enable staging environments
- Enable configuration file changes
The final result should look like this:
When opening your preview environment, you are now greeted with a password prompt before you can continue.
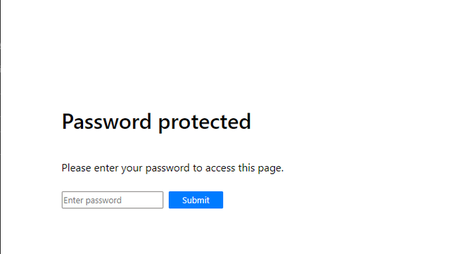
After logging in, I get to see my website exactly as I would expect it to be in production.
Bonus tip: Disable unused logins
When using the paid plan password protection, it relies on Basic Authentication. This is fully controlled by Azure. The other three login types (Twitter, GitHub or Azure Active Directory account) are ENABLED by default - even if you do not use them to secure any route.
A good security practice is to disable what you do not use, and this can be done by adding a staticwebapp.config.json route file.
This file can be placed anywhere in your static website directories, but the source root folder /src is the most logical place.
In the file all unused logins are set to return HTTP 401 “Not authorized”, and then catch all 401s and redirect them to the site root. This will also trigger the Basic Authentication login prompt if you try to navigate to the login URLs directly.
|
|
Adding playwright tests for verification
Mart de Graaf has gracefully assisted me with a couple of playwright scripts that verify that this is all configured correctly.
The playwright script can be pasted into the /tests directory.
|
|
The build needs to be adjusted to pass through the correct URL prefix, or the playwright tests won’t navigate to the correct URL.
Add these lines to the workflow in /.github/workflows/playwright-onDemand.yml.
Make sure to replace the root URL with the one for your specific Static Web App!
|
|
And then pass the PLAYWRIGHT_TEST_BASE_URL variable to the playwright tests.
|
|
Finally, adjust the /playwright.config.ts to use this new base URL.
|
|
The tests will now be run during a pull request, and when merging to main, ensuring no unused logins are available in your production environment.